A Crash Course In Calibration
 There are two parts to Calibration of your AV system - AUDIO and VIDEO. The following is a very simple explanation as the true nature of this topic far exceeds what could possibly be included in this BLOG.
Lets start with VIDEO.
Electronic Imaging Display Devices are based on the fact that we see in three primary colours - RED, GREEN and BLUE. Therefore every colour we see [both in the real world and on an electronic imaging displays] is made up of combinations of these three primary colours. The range that these colours appear on an electronic imaging device is called the GREY SCALE and it ranges from 0 to 255 [in PC values].

WHY GREY?
Simply put, equal amounts of RED, GREEN and BLUE equals GREY in VIDEO and the colour of GREY should be D6500K.
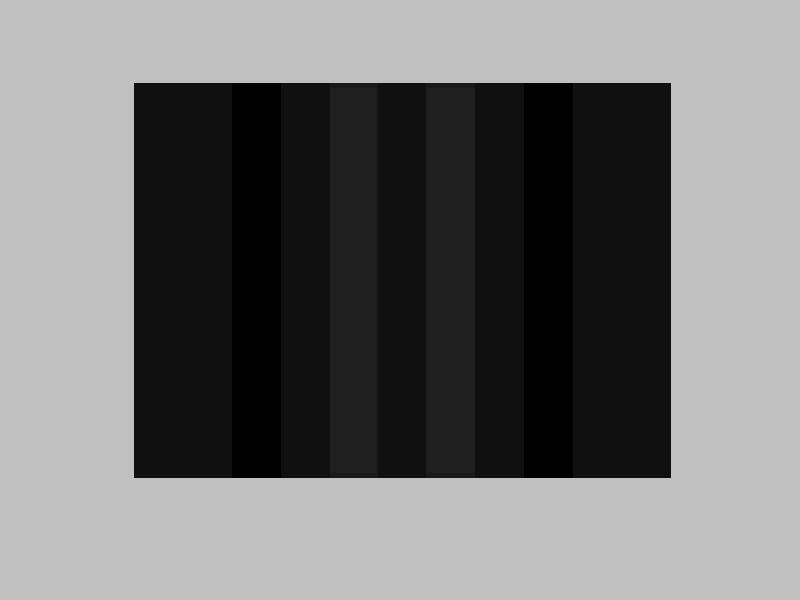
There are 11 shades of GREY in this "Reverse Ramps" pattern. The values here are in 10% increments where the very black [top left/bottom right] are RGB levels at PC 0. At the other end of the "Reverse Ramps" pattern is white at PC 255.
Video however does not extend to the full range of the signal, but is limited from "Video Black" [PC 16] to "Video White" [PC 235]. The range above white and below black is needed to prevent hard clipping of the video signal. Some sources [and or displays] can not display below PC 16 or above PC 235. If your source or display does clip the signal, it makes calibration more difficult than if you could see what is happening above WHITE and below BLACK.
SETTING BLACK LEVELS
A simple test to confirm if your system is clipping the video levels is to use a "PLUGE" test pattern. This pattern can be found on Joe Kane Productions - Digital Video Essentials or on a THX Optimiser found on many DVDs that are transfered by THX.
On this pattern there are 3 shades of grey. The VIDEO BLACK background is PC 16, the BLACKER THAN BLACK stripes are PC 0 and the ABOVE BLACK stripes are PC 32. I choose 0 and 32 as it is easier to see than the normal 4% above and below video black. Basically what this pattern represents is black levels below and above VIDEO BLACK.
When setting your display's "BRIGHTNESS" or "BLACK LEVEL", you want to adjust the display's control so that the BLACKER THAN BLACK [PC 0] bars match the VIDEO BLACK [PC 16] background. You should still be able to see the ABOVE VIDEO BLACK [PC 32] bars.
SETTING WHITE LEVELS
The "RAMPS" pattern above is the easiest way to set modern video displays as you can see shades of grey BELOW and ABOVE VIDEO WHITE. White in video is PC 235, but there is no shade in these RAMPS pattern that is set to that level. What you need to see when you set the CONTRAST or PEAK WHITE level on your display is white at VIDEO WHITE and white ABOVE VIDEO WHITE. As mentioned above, some sources and displays clip the levels from PC 16 - PC 235, so you won't be able to see ABOVE WHITE or BELOW BLACK.
SETTING COLOUR
Given that equal amounts of RED GREEN BLUE equal GREY, means that unequal amounts provide all of the other colours...
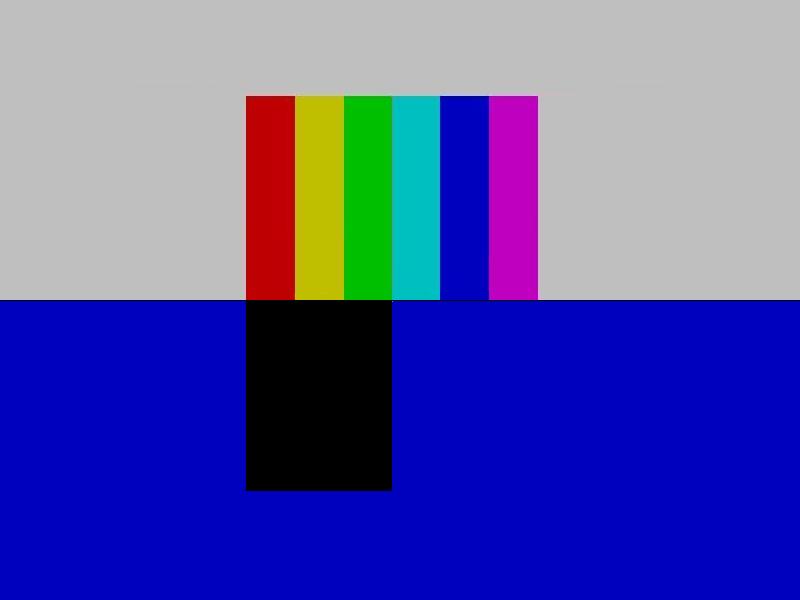
The image is divided in two and shows how the pattern would look both with [bottom half] and without [top half] the blue filter. Note that the RED YELLOW and GREEN now appear as BLACK. This is because they contain NO BLUE...
I created these COLOUR BARS on the PC at about 75% of their full range.
This pattern is comprised of -
PRIMARY COLOURS - RED GREEN BLUE
SECONDARY COLOURS - YELLOW CYAN MAGENTA
TERTIARY COLOUR - GREY.
If I had used the full PC 255 level, the GREY would actually be WHITE.
When setting COLOURS on your display, you should have at least a BLUE FILTER which is equal to WRATTEN 50. When viewing through the filter, the colours that contain BLUE will all appear the same once the setting is correct. So using a BLUE FILTER with a colour bar test pattern and you would see that the BLUE in the BLUE and the BLUE in the GREY matched. Also the BLUE in both the CYAN and MAGENTA also should match.
ADJUSTING TINT
comes in. Generally when using Sometimes the colours CYAN and MAGENTA don't match. This is where TINTPAL, we don't need to use TINT and in some cases, the display itself won't let you access to the TINT control. TINT shifts the colour bias between GREEN and MAGENTA.
SETTING SHARPNESS
SHARPNESS is a control that does not do what its name suggests. The SHARPNESS control is intended to increase detail, but what it actually does is add a white line to highlight dark parts of the picture. As a result it adds noise to the image as well as increases the CONTRAST. Whilst there is a propper patterns for the adjustment of SHARPNESS, it usually has no use in consumer display devices...
AUDIO ADJUSTMENTS...

An SPL Meter is an invaluable tool as it will allow you to monitor the level of sound pressure from each speaker of your system. The following is brief, but is how your system should be calibrated but only applies to systems that have trims on ALL channels.
1. Set up the SPL Meter to the "75dB" position, select "C" and "slow". I use the digital meter on the right, so there is no 75dB setting and I also mount the meter on a tri-pod at the main seating location.
2. Turn the Master Volume to a "00dB" reference position. I use the actual 00dB position on my AVR which automatically winds up to that level from the previous listening level once the calibration mode is selected.
3. Activate the Internal Test Tone Generator of the sound system. My system automatically begins to output sound from the Left Speaker once it has reached the 00dB position.
4. Adjust the channel trims of each speaker in turn to read +75dB on the meter.
5. Adjust the SUB WOOFER to read 79dB on the meter. When using the Radio Shack Meter on the left, you will have to select the 80dB scale for this setting.
You are now Calibrated so that you can hear all of your motion picture soundtracks the way they were meant to be heard...
Mark
Inquiries
Back To The Top
posted by CAVX at
9:32 am
![]()
![]()


<< Home